Moving to another house will always be challenging, partly due to the large number of household items that are usually transported between the two homes.
If you happen to be moving out of a house with a big garden, then there’s a great chance that you have a bunch of garden tools that you would like to take with you to the new residence: hand tools, power tools (electric tools), and even some gas-powered tools.
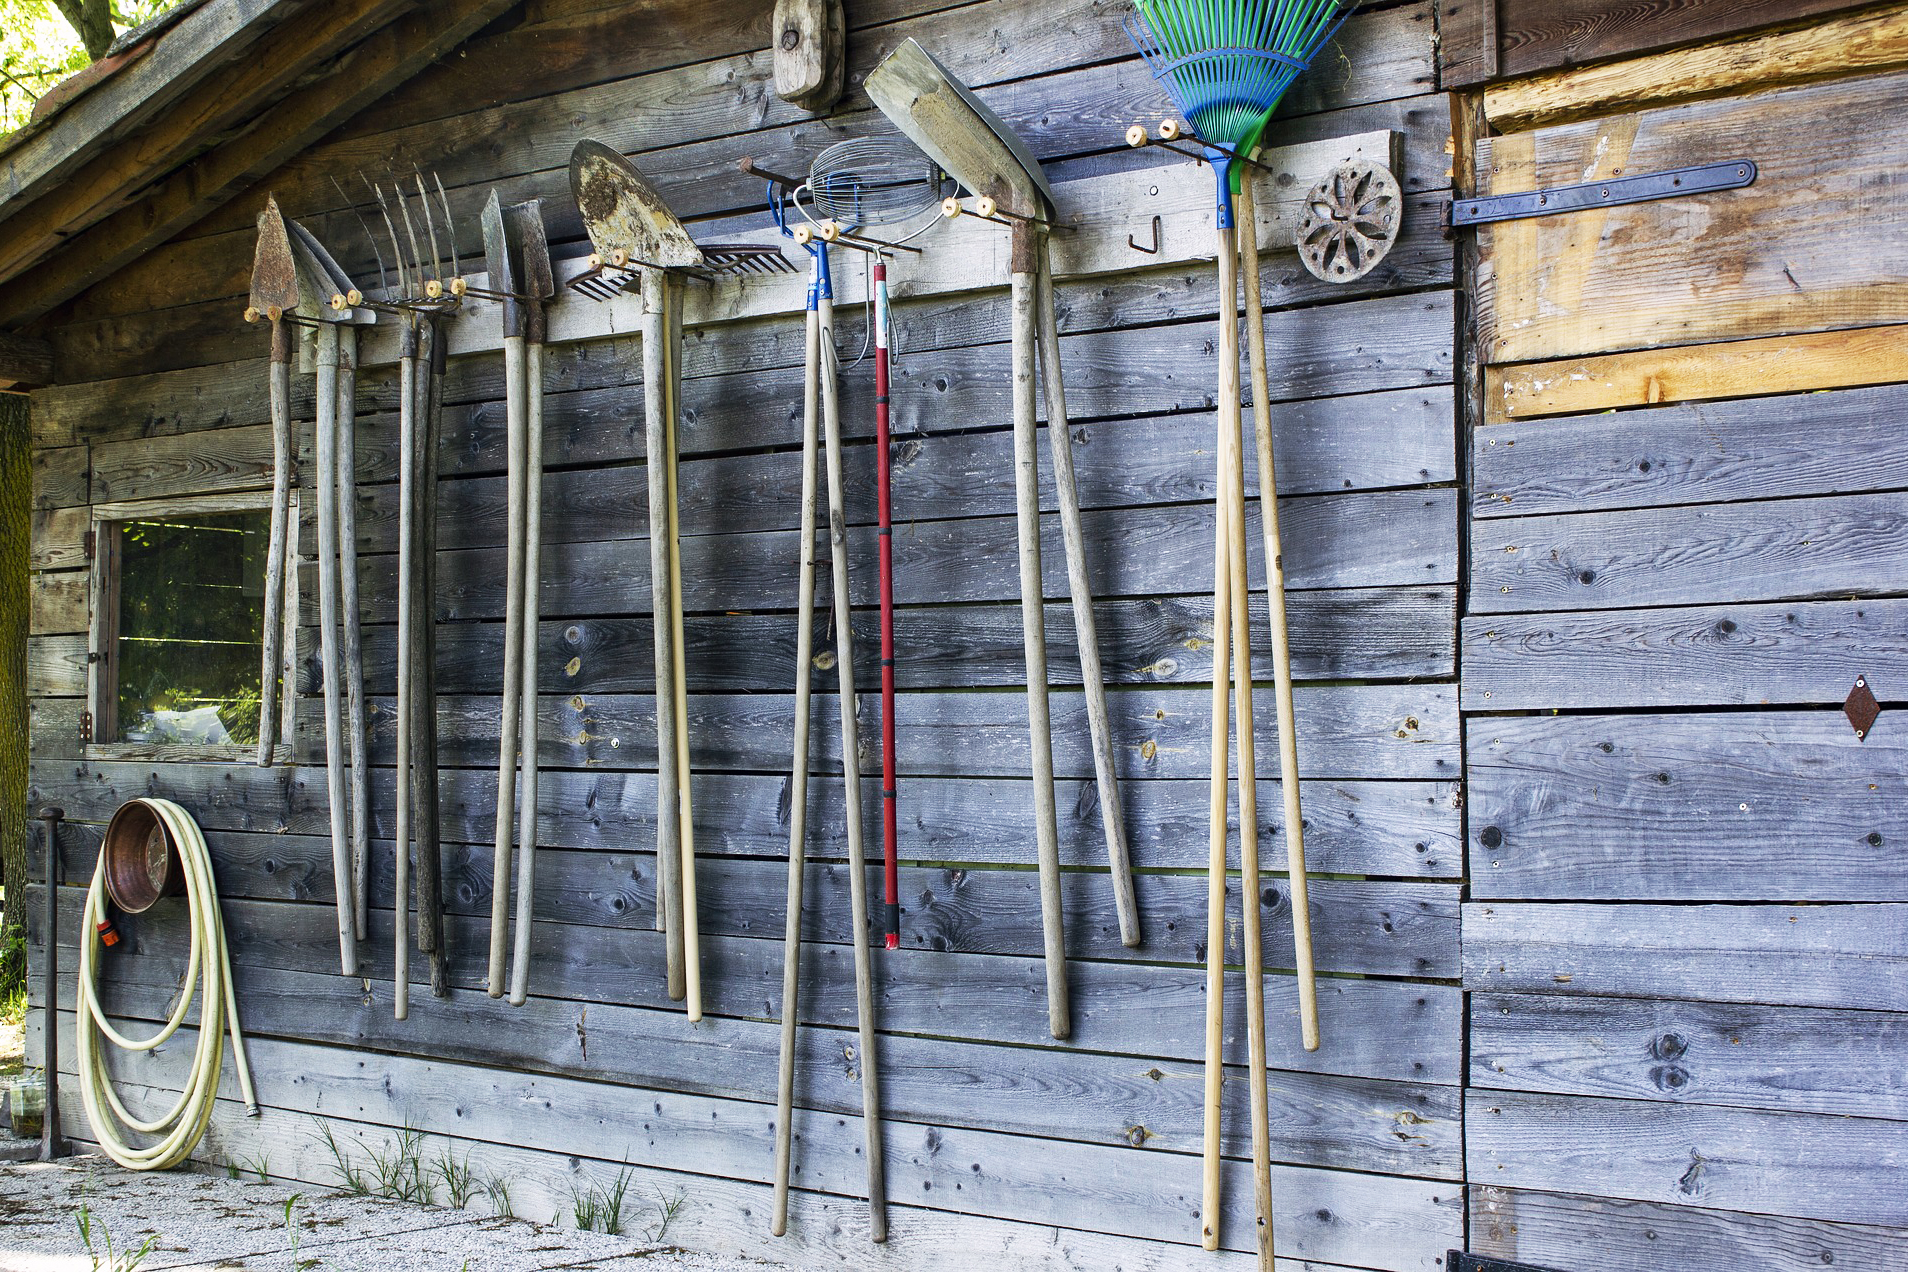
And if that’s the case, you’ll most certainly have some of the most common gardening tools with long handles such as
- spades,
- shovels,
- pitchforks,
- hoes,
- leaf rakes,
- scythes,
- brooms, and so on.
Additionally, you’re likely to also have a set of gardening tools with short handles such as
- axes,
- hatchets,
- hand hoes,
- hand cultivators,
- small trowels,
- small garden forks, and so on.
Packing and moving long-handled garden tools can be trickier than you might think for several valid reasons:
- Most of the gardening tools are oddly shaped and their unusual shapes will make the packing and moving process a bit more difficult.
- Those types of gardening tools have long handles and that alone can present a few issues during the packing and moving processes. The standard length of shovels and spades is about 48’’.
- All long-handled garden tools have sharp blades or edges, and some are much sharper than others. Therefore, safety becomes a priority when packing and moving garden tools with long handles.
Follow these 7 steps to learn the best way to pack garden tools for moving
Step 1. Prepare the necessary packing materials
Before you can begin to pack up your gardening tools, you’re going to need the proper packing materials to protect them adequately for the road ahead.
Keep in mind that the padding materials you use on the hand tools will protect you and anyone else who’s handling those objects from getting hurt due to their sharp edges and open blades.
The packing supplies you will need for packing your long-handled garden tools are:
- Furniture blankets or regular household blankets. Make sure those blankets are old and inexpensive because they are likely to get dirty or even torn out during the house move.
- Bubble wrap. You’re going to need a good amount of bubble wrap to make the gardening tools perfectly safe for transport. It’s best to use plastic wrap with large air-filled bubbles.
- Packing tape. You’re going to use the packing tape to secure the padding materials around each gardening tool.
Step 2. Inspect your gardening tools
This step is about taking a closer look at each garden tool with the purpose of deciding whether it’s worth the trouble of packing and moving those tools in the first place.
Inspect each tool and look for any signs of damage such as excessive rust on the metal parts, bent or broken elements, cracks along the metal surface, broken or worn-out handles, and so on.
Also, determine whether you will actually need all those gardening tools in the new house. This is especially relevant if you have duplicates – for example, a brand-new rake that can now replace your old one, or if the garden of the destination place is too small to move the entire range of your tools.
Bear in mind that in some cases, it’ll make much more sense to chuck some of your old gardening tools and buy new ones after the move.
Must-read: 20 DO’S and 20 DON’TS when moving to a new house
Step 3. Get rid of the garden tools that are not worth moving
If your final decision is to leave behind some of the gardening tools you own, the next step is to determine what you will do with them before you are scheduled to move away.
If a tool is still usable but you’re not taking it with you for some reason – for instance, it’s a duplicate, then you can give it away to a neighbor if they want it. After all, why should you throw away a perfectly good tool for the garden?
But if any of your garden tools have reached the end of their practical usability, then you shouldn’t think twice about throwing them away in an eco-friendly way. But remember that in some cases, it may be worth it to save a part of a gardening tool – for example, its wood handle – and use it later in the new house.
Step 4. Clean the garden tools you want to take with you
The next thing you want to do when moving your garden tools to another house is to clean the instruments before packing them up. After all, it’s not a good idea to wrap the tools in protective materials when they are dirty since they can make a real mess inside the moving truck or inside the garden shed of the new home.
The good news is that there’s nothing complicated about cleaning your gardening tools. The only downside is that the process will take some time to complete and you are likely to be short on time during your pre-move preparation.
If there’s dry mud on any of your gardening tools, then you should use a scraper to remove it. Then, use a sponge and water to clean up both the metal and wood parts. Make sure you leave the hand tools in the sun to dry up completely before you pack them up for transport.
Step 5. Group your long-handled garden tools by size
The next step to packing and moving your garden tools is to group the items by their size. This will make the packing process safer and more efficient since handles that are similar in size will be bundled together.
Usually, axes, hatchets, hand hoes, hand cultivators, small trowels, and small garden forks will have much shorter handles than the rest of the gardening tools, so they should be packed up together.
Similarly, spades, shovels, pitchforks, hoes, rakes, and scythes will have longer handles that will fit well together and stay safely inside a protective bundle.
Read also: How to pack a garage for moving
Step 6. Secure the blades and edges of your sharp garden tools
The trickiest aspect of packing hand tools for the garden is making sure each item is made completely safe for transport – meaning, that it cannot hurt anyone who’s carrying it and it won’t damage other household items inside the truck.
Long-handled garden tools, together with short-handled ones, always have either open blades or edges that are sharp enough to cause damage if no strict safety measures are taken. And this is exactly what you should do – secure their sharp metal parts to prevent moving day accidents.
Follow these 2 simple steps to secure the sharp gardening tools:
- Wrap all sharp metal parts of each garden tool with several pieces of bubble wrap. Using second-hand or discarded bubble wrap for this purpose is completely fine.
- Use pieces of tape to fix the protective plastic material over the dangerous bits of your various gardening tools.
See also: How to pack and move a lawn mower
Step 7. Pack safely all your gardening tools
Once you make sure the sharp blades and edges of your garden tools cannot cause any damage and won’t hurt anyone during the residential move, it’s time to bundle those objects together for easier transportation.
If you happen to own a scythe and you wish to take it with you, make sure you remove the blade, secure it well with several sheets of bubble wrap, and transport it separately from its handle. By far, the scythe is the most dangerous tool of them all.
Here are the few steps you should follow to finish packing up your gardening tools for a move:
- Position several long-handled garden tools together and wrap them up with a moving blanket to form a tight bundle. The padded fabric will keep them well-protected against damage.
- Bundle your short-handled gardening tools and wrap them up in a furniture blanket as you did with the long-handled tools.
- Use packing tape to secure each bundle and keep the blankets from unwrapping on the road.
Useful info: Why should you hire professional movers?